

今回はCentOS7にNginxをインストールしていきます。
CentOS7にNginxをインストールする。
Nginxのリポジトリ情報を登録する。
/etc/yum.repos.d/nginx.repoを開いたら下記のリポジトリ情報を記述して保存します。
Bash
vi /etc/yum.repos.d/nginx.repo
[nginx]
name=nginx repo
baseurl=https://nginx.org/packages/centos/$releasever/$basearch/
gpgcheck=0
enabled=1
Nginxをインストールする。
リポジトリ情報を登録したらnginxをインストールします。
Bash
yum install -y nginx
読み込んだプラグイン:fastestmirror
Loading mirror speeds from cached hostfile
* base: ftp.yz.yamagata-u.ac.jp
* epel: ftp.riken.jp
* extras: ftp.yz.yamagata-u.ac.jp
* updates: ftp.yz.yamagata-u.ac.jp
nginx | 2.9 kB 00:00:00
nginx/7/x86_64/primary_db | 35 kB 00:00:00
依存性の解決をしています
--> トランザクションの確認を実行しています。
---> パッケージ nginx.x86_64 1:1.14.0-1.el7_4.ngx を インストール
--> 依存性解決を終了しました。

依存性を解決しました

=======================================================================================================================================================================
Package アーキテクチャー バージョン リポジトリー 容量
=======================================================================================================================================================================
インストール中:
nginx x86_64 1:1.14.0-1.el7_4.ngx nginx 750 k

トランザクションの要約
=======================================================================================================================================================================
インストール 1 パッケージ

総ダウンロード容量: 750 k
インストール容量: 2.6 M
Downloading packages:
nginx-1.14.0-1.el7_4.ngx.x86_64.rpm | 750 kB 00:00:04
Running transaction check
Running transaction test
Transaction test succeeded
Running transaction
インストール中 : 1:nginx-1.14.0-1.el7_4.ngx.x86_64 1/1
----------------------------------------------------------------------

Thanks for using nginx!

Please find the official documentation for nginx here:
* https://nginx.org/en/docs/

Please subscribe to nginx-announce mailing list to get
the most important news about nginx:
* https://nginx.org/en/support.html

Commercial subscriptions for nginx are available on:
* https://nginx.com/products/

----------------------------------------------------------------------
検証中 : 1:nginx-1.14.0-1.el7_4.ngx.x86_64 1/1

インストール:
nginx.x86_64 1:1.14.0-1.el7_4.ngx

完了しました!
Nginx起動系コマンド。
Nginxの起動系コマンドは以下のものがあります。
Bash
systemctl start nginx     #nginxサービスをスタートさせる
systemctl status nginx    #nginxサービスの状況を確認する
systemctl reload nginx    #nginxサービスをリロードさせる
systemctl restart nginx   #nginxサービスをリスタートさせる
systemctl stop nginx      #nginxサービスを停止させる
systemctl enable nginx    #nginxサービスを自動起動させる
systemctl disable nginx #nginxサービスの自動起動を停止させるNginxサービスをスタートさせます。
Bash
systemctl status nginx
● nginx.service - nginx - high performance web server
Loaded: loaded (/usr/lib/systemd/system/nginx.service; disabled; vendor preset: disabled)
Active: active (running) since 水 2018-07-18 11:38:14 JST; 21min ago
Docs: https://nginx.org/en/docs/
Process: 80915 ExecStart=/usr/sbin/nginx -c /etc/nginx/nginx.conf (code=exited, status=0/SUCCESS)
Main PID: 80916 (nginx)
CGroup: /system.slice/nginx.service
tq80916 nginx: master process /usr/sbin/nginx -c /etc/nginx/nginx.conf
mq80917 nginx: worker process

7月 18 11:38:14 localhost.localdomain systemd[1]: Starting nginx - high performance web server...
7月 18 11:38:14 localhost.localdomain systemd[1]: PID file /var/run/nginx.pid not readable (yet?) after start.
7月 18 11:38:14 localhost.localdomain systemd[1]: Started nginx - high performance web server.emctl start nginxこの時点でエラーが出なければNginxは正常に起動していますが、正常に動作しているかステータスを確認することができます。
ここに表示されたステータスの内、2行目の●が緑であれば正常に起動している状態、赤であればエラーがあり正常に起動できていない状態、白であれば停止している状態を示します。
また、起動プロセスを表示するpsコマンドでも確認することができます。
Bash
ps -aux | grep nginx
root 80916 0.0 0.0 46404 960 ? Ss 11:38 0:00 nginx: master process /usr/sbin/nginx -c /etc/nginx/nginx.conf
nginx 80917 0.0 0.2 48888 2248 ? S 11:38 0:00 nginx: worker process
root 81021 0.0 0.0 112720 980 pts/0 R+ 12:03 0:00 grep --color=auto nginxNginx自動起動の設定
Bash
systemctl enable nginx
Created symlink from /etc/systemd/system/multi-user.target.wants/nginx.service to /usr/lib/systemd/system/nginx.service.firewalldのゾーン確認を行います。
Bash
firewall-cmd --list-all-zones

block
target: %%REJECT%%
icmp-block-inversion: no
interfaces:
sources:
services:
ports:
protocols:
masquerade: no
forward-ports:
source-ports:
icmp-blocks:
rich rules:

dmz
target: default
icmp-block-inversion: no
interfaces:
sources:
services: ssh
ports:
protocols:
masquerade: no
forward-ports:
source-ports:
icmp-blocks:
rich rules:

drop
target: DROP
icmp-block-inversion: no
interfaces:
sources:
services:
ports:
protocols:
masquerade: no
forward-ports:
source-ports:
icmp-blocks:
rich rules:

external
target: default
icmp-block-inversion: no
interfaces:
sources:
services: ssh
ports:
protocols:
masquerade: yes
forward-ports:
source-ports:
icmp-blocks:
rich rules:

home
target: default
icmp-block-inversion: no
interfaces:
sources:
services: ssh mdns samba-client dhcpv6-client
ports:
protocols:
masquerade: no
forward-ports:
source-ports:
icmp-blocks:
rich rules:

internal
target: default
icmp-block-inversion: no
interfaces:
sources:
services: ssh mdns samba-client dhcpv6-client
ports:
protocols:
masquerade: no
forward-ports:
source-ports:
icmp-blocks:
rich rules:

public (active)
target: default
icmp-block-inversion: no
interfaces: ens33
sources:
services: ssh dhcpv6-client
ports:
protocols:
masquerade: no
forward-ports:
source-ports:
icmp-blocks:
rich rules:

trusted
target: ACCEPT
icmp-block-inversion: no
interfaces:
sources:
services:
ports:
protocols:
masquerade: no
forward-ports:
source-ports:
icmp-blocks:
rich rules:

work
target: default
icmp-block-inversion: no
interfaces:
sources:
services: ssh dhcpv6-client
ports:
protocols:
masquerade: no
forward-ports:
source-ports:
icmp-blocks:
rich rules:zone状態は初期段階でpublicとなっていて、サービスはsshとdhcpv6-clientだけが有効になっている状態です。
Bash
firewall-cmd --get-default-zone
public

firewall-cmd --permanent --list-services
ssh dhcpv6-clientここで一旦zoneを全てdropにして、sshとhttpとhttpsを開放するように設定します。
Bash
firewall-cmd --set-default-zone=drop
firewall-cmd --add-service=ssh --permanent
firewall-cmd --add-service=http --permanent
firewall-cmd --add-service=https --permanent設定を反映させ、drop (active)の項目のserviceにsshとhttpが登録されていることを確認します。
Bash
firewall-cmd --reload

drop (active)
target: DROP
icmp-block-inversion: no
interfaces: ens33
sources:
services: ssh http https
ports:
protocols:
masquerade: no
forward-ports:
source-ports:
icmp-blocks:
rich rules:
例えばサーバーのローカルIPアドレスが192.168.128.155だとした場合、
https://192.168.128.155/
をブラウザへ入力すると次のようなウェルカムページが表示されます。
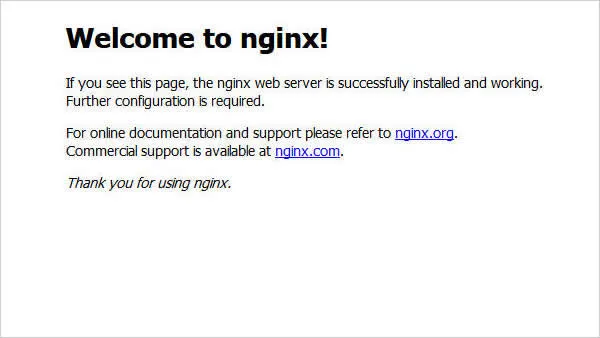
nginxのインストールは以上となります。

コメント